Build Wizard
Never written a Dockerfile before? Don't worry! Build Wizard analyzes your project and automatically generates an optimized Dockerfile for you. With just a few clicks, you can have your container build ready to go. Both GitLab and GitHub repositories are supported.
Why Read This Guide
By following this guide, you can containerize a new project without writing a single line of Dockerfile, and prepare multiple services in a monorepo for build in one pass. Even non-developer operations team members can follow the three steps "Detect Project → Configure → Commit" to add build files to a Git repository automatically.
- Auto-detection: Automatically identifies project language, framework, and package manager.
- Optimized Templates: Best practices like multi-stage builds and non-root users are applied.
- Monorepo Support: Handles projects with multiple services at once.
- Ready to Use: Generated Dockerfile is auto-committed to the Git repository, ready to build immediately.
Before You Start: Terms to Know
Before diving in, here is a one-line definition for each term that appears repeatedly. When a term first shows up in the body, you will see a "(See: Glossary)" pointer.
| Term | Definition + everyday analogy |
|---|---|
| Dockerfile | A recipe file that defines how to build a container image. Like a cooking recipe — it lists ingredients (base image) and steps (commands). |
| BuildKit | The image build engine KIOPS uses. Like a factory conveyor belt — takes in a Dockerfile and stamps out an image. |
| Monorepo | A single Git repository that holds multiple projects (frontend, backend, etc.). Like a shopping mall — several stores housed in one building. |
| Base image | The starting image specified in Dockerfile's FROM (alpine, slim, etc.). Like the starter dough in cooking — the lighter it is, the smaller the resulting image. |
| Build context | The working directory passed to Docker at build time. Like the ingredients on a chef's prep counter — anything not on the counter cannot be used. |
| Git repository | A source code version control system (GitLab/GitHub). Like a shared document folder that keeps every revision. |
| Branch | A parallel work line in the same repository (main, develop, etc.). Like a copy of a document — work on it separately, then merge. |
When to Use
- New projects: Containerize a project started without a Dockerfile.
- Legacy migration: Convert an existing project to Docker-based.
- Monorepo setup: Containerize multiple services at once.
- Rapid prototyping: Quickly set up a build environment with optimized templates.
Projects that already have a Dockerfile skip Build Wizard and start building directly. If you want to replace an existing Dockerfile, you can generate a new one in Build Wizard.
Supported Project Types
KIOPS Build Wizard automatically detects the following project types.
- Node.js
- Python
- Go
- Java
- Ruby
- PHP
- Rust
- .NET / C#
- Static site
- Other
Within each project type, common frameworks below are auto-detected and matched to an appropriate build template.
Node.js
- Next.js (SSR, port 3000): React full-stack framework supporting App Router and Pages Router.
- React (SPA, port 80): React SPA including CRA and Vite
- Vue.js (SPA, port 80): Vue 2/3 applications.
- Angular (SPA, port 80): Angular CLI projects.
- NestJS (API, port 3000): TypeScript backend framework
- Express.js (API, port 3000): Node.js web framework
Python
- FastAPI (API, port 8000): High-performance async API framework
- Django (API, port 8000): Python full-stack framework
- Flask (API, port 5000): Lightweight micro framework
- Streamlit (SSR, port 8501): Data app/dashboard framework
Java
- Spring Boot (API, port 8080): Java enterprise framework
- Quarkus (API, port 8080): Cloud-native Java
Other Languages
- Go (Compiled, port 8080): Uses go mod for package management.
- Rust (Compiled, port 8080): Uses cargo for package management.
- .NET/C# (Compiled, port 8080): Uses dotnet for package management.
- Ruby (API, port 3000): Uses bundler for package management.
- PHP (API, port 80): Uses composer for package management.
- Static Site (Static, port 80): No package manager required.
Understanding Build Types
Build Wizard automatically selects the appropriate build type based on the framework.
- SPA (Static site / Single Page Application): Final image contains Nginx + built static files.
- SSR (Server-side rendering): Final image contains Node.js runtime + application.
- API (Backend API server): Final image contains runtime + application code.
- Compiled (Compiled language like Go, Rust): Final image contains binary only (lightweight image)
- Static (Pure static files): Final image contains Nginx + HTML/CSS/JS
Dockerfile structure, base image, and run commands differ based on build type. For example, SPA is served via Nginx after building, while SSR handles requests directly through a Node.js server.
Build Wizard Flow
KIOPS Build Wizard consists of three steps.
Step 1: Project Detection → Step 2: Build Settings → Step 3: File Generation (preview + commit)
flowchart LR
    A[Open Build Wizard] --> B[Detect Project Type]
    B --> C{Monorepo?}
    C -->|Yes| D[Select Services]
    C -->|No| E[Single Config]
    D --> F[Generate Template]
    E --> F
    F --> G[Edit Files]
    G --> H[Commit to Git Repo]
    H --> I[Ready to Build]
Opening Build Wizard
How to Open
- Navigate to the [Service Management] page
- Click the Build stage on the row for the service to configure
- The Build Wizard modal opens automatically.
Auto-open Conditions
- No Dockerfile: Build Wizard opens automatically.
- Dockerfile present: Build starts immediately.
- Only docker-compose.yml: Build Wizard opens (notification that Dockerfile is needed)
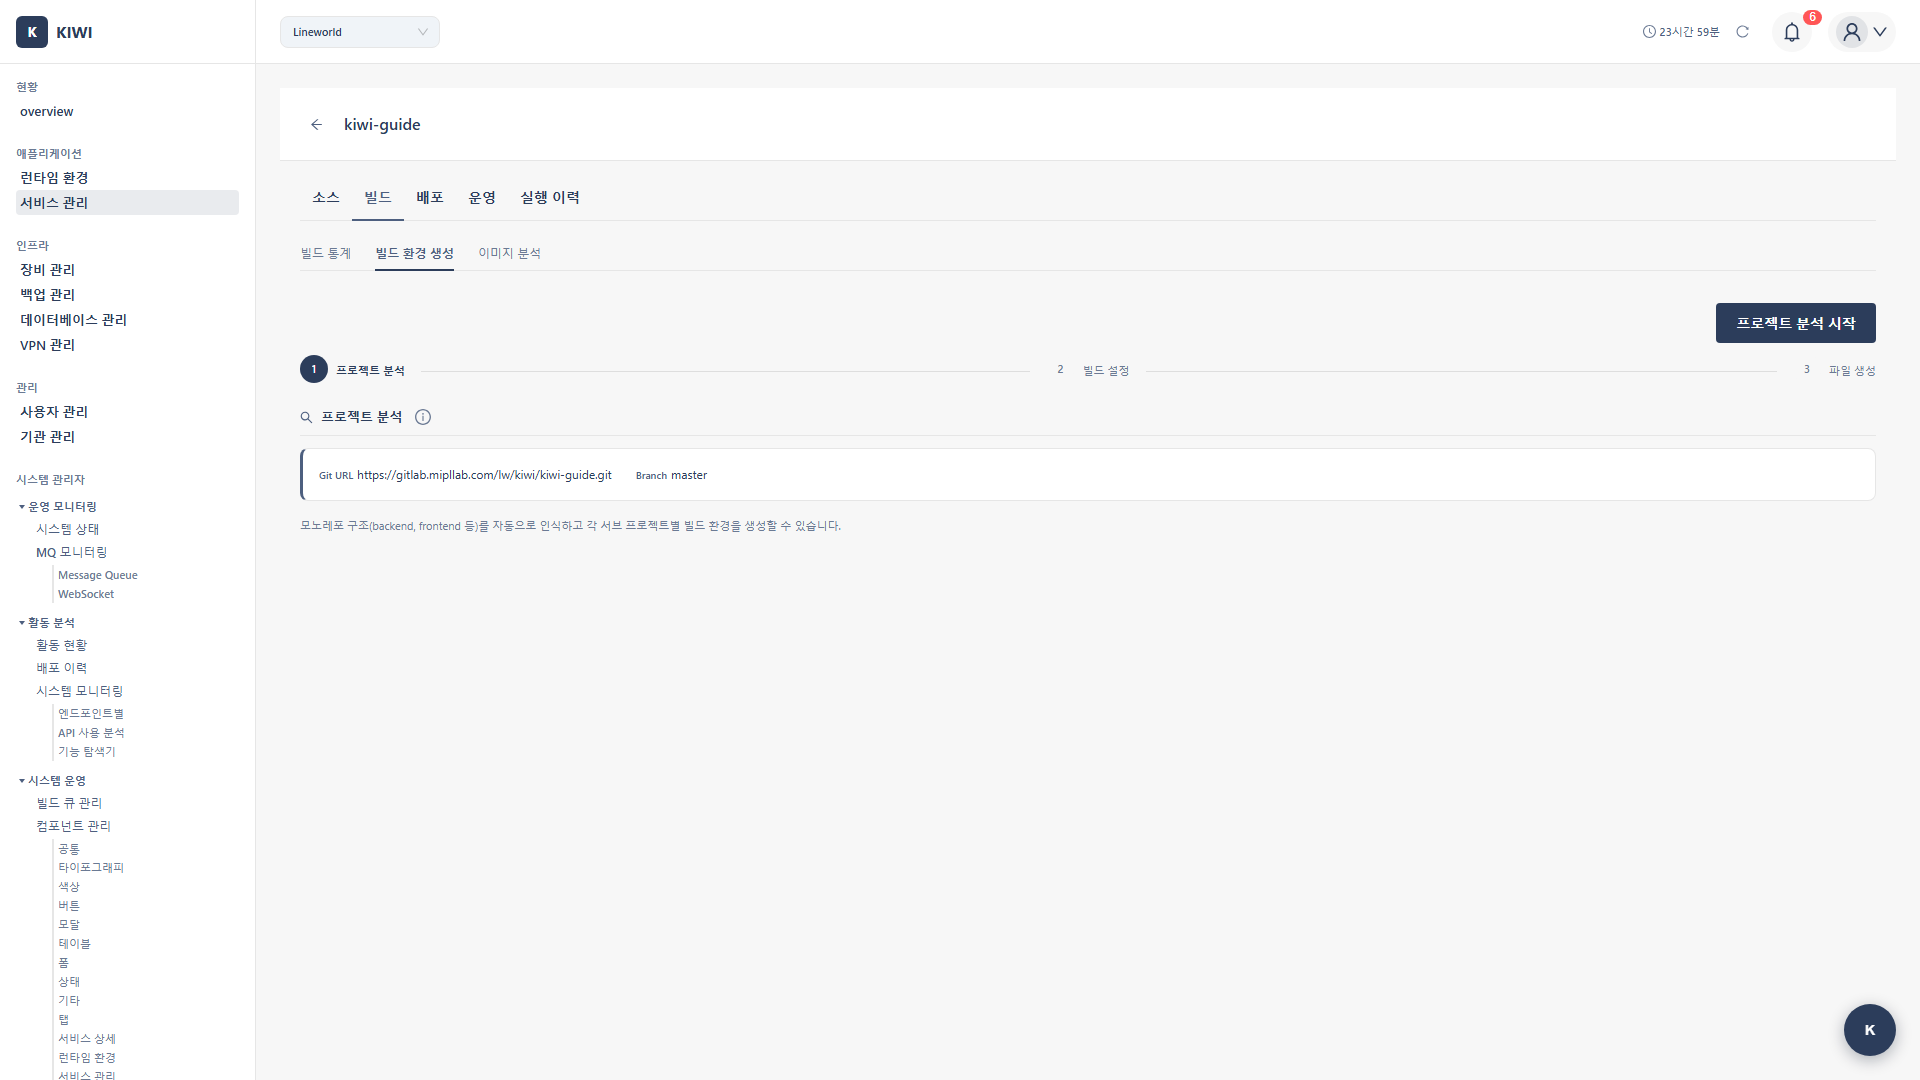
Modal Components
- Steps display: Shows current progress (1~3)
- Git URL: Repository URL to analyze (auto-filled)
- Branch: Target branch (pulled from service settings)
- Start project analysis button: Click to start analysis.
Step 1: Detect Project Type
This step has KIOPS scan your Git repository to identify the project structure and framework. (See: Git repository)
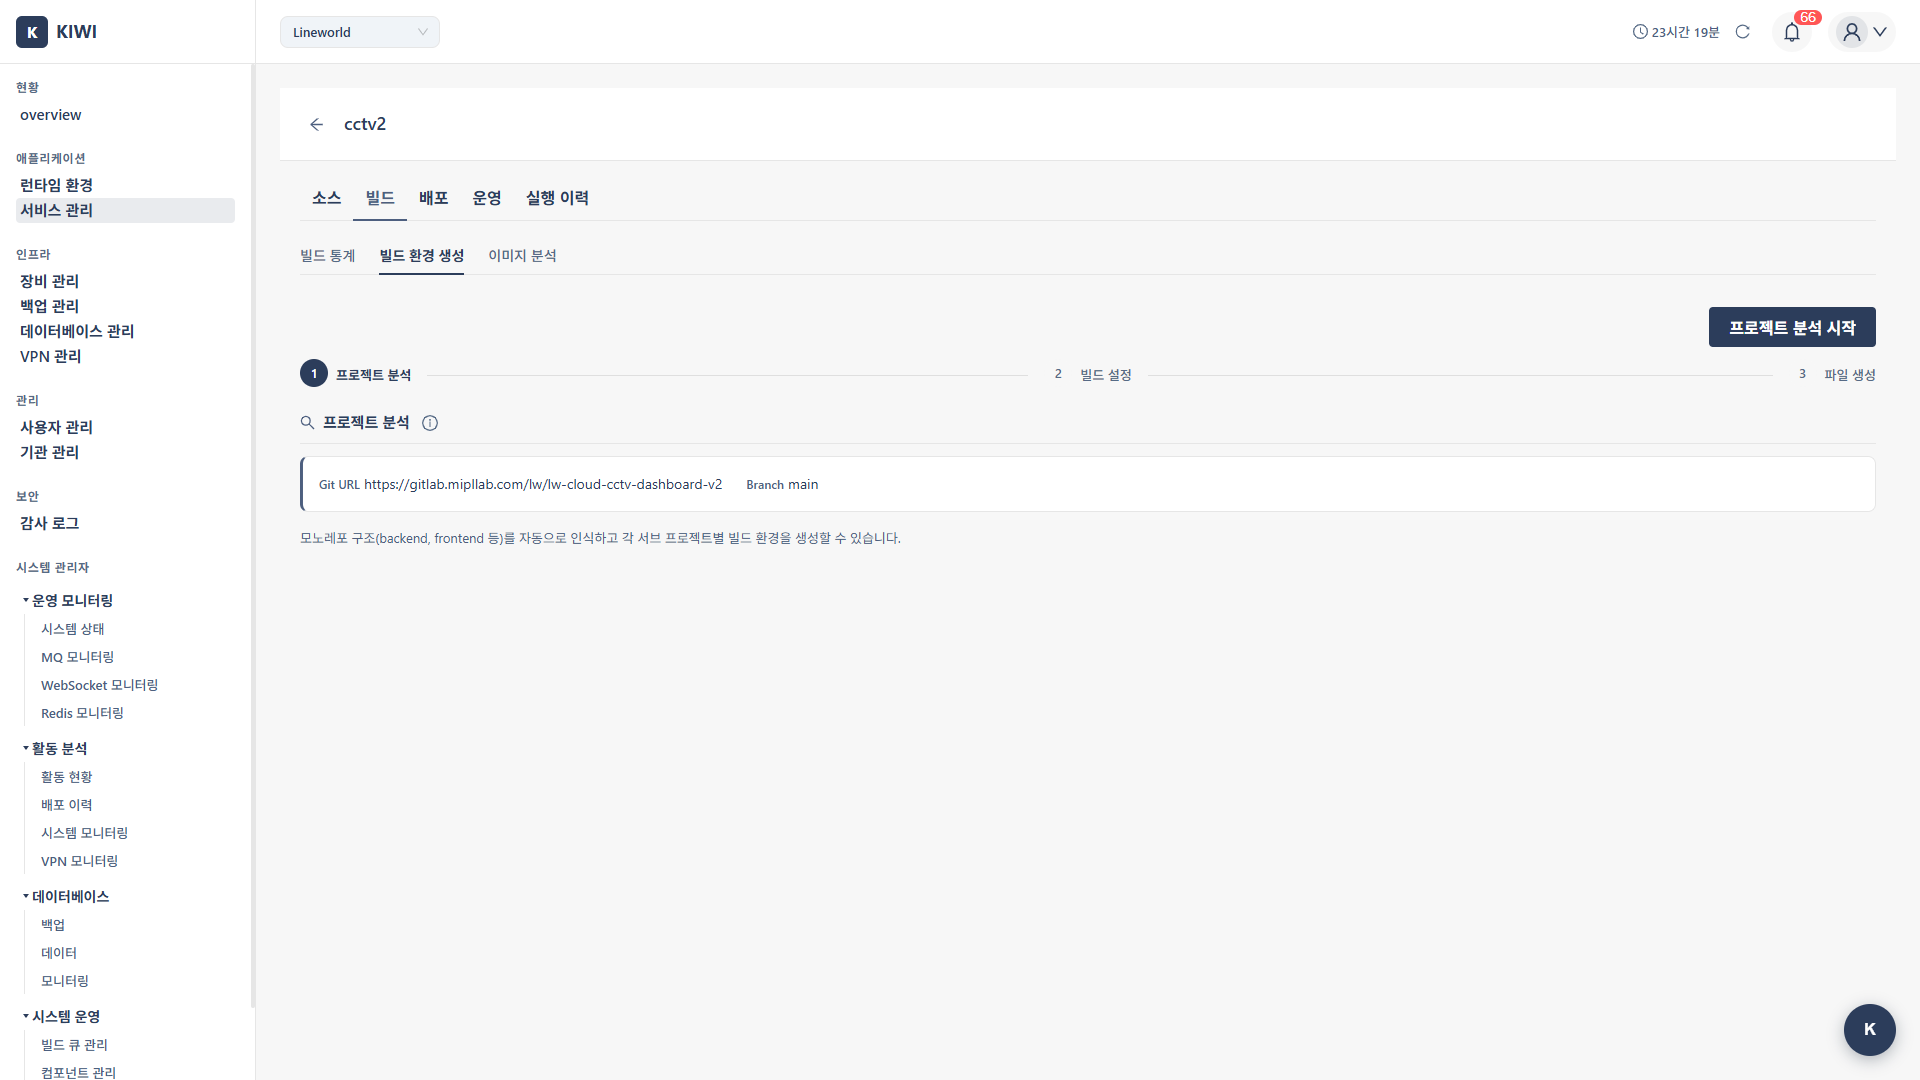
1.1 Run Detection
Click the Start project analysis button and KIOPS analyzes the Git repository.
If detection fails with "403 Forbidden" or "401 Unauthorized", the GitLab/GitHub token registered for your organization lacks the required permissions. Make sure the token has at least read_repository (GitLab) or repo:read (GitHub). A token is mandatory for scanning private repositories.
1.2 Analysis Items
- Project type: Detected by the presence of config files. (e.g.,
package.json→ Node.js) - Framework: Detected by dependency analysis. (e.g.,
nextpackage → Next.js) - Package manager: Verified by lock file. (e.g.,
yarn.lock→ Yarn) - TypeScript: Whether tsconfig.json exists. (Yes/No)
- Build type: Determined by framework. (e.g., Next.js → SSR)
- Monorepo: Detected by sub-directory analysis. (e.g.,
frontend/,backend/)
1.3 Detection Result Screen
Single Project
Project analysis complete!

Project type: Node.js
Framework: Next.js
Package manager: npm
Build type: SSR (Server-side rendering)
TypeScript: Yes
Default port: 3000
Monorepo
(See: Monorepo)
Monorepo detected: 3 sub-projects found

┌────────────┬───────────┬─────────────┬──────────┐
│ Path       │ Type      │ Framework   │ Select   │
├────────────┼───────────┼─────────────┼──────────┤
│ frontend/  │ Node.js   │ React       │ ✓        │
│ backend/   │ Python    │ FastAPI     │ ✓        │
│ admin/     │ Node.js   │ Vue.js      │ ✓        │
└────────────┴───────────┴─────────────┴──────────┘
1.4 Existing File Warning
If a Dockerfile or docker-compose.yml already exists:
Files already exist: Dockerfile, docker-compose.yml
Proceeding will overwrite these files.
If only a root package.json exists and sub-directories have no separate config files, KIOPS detects the project as a single repo. Conversely, if both the root and sub-directories have package.json files, the build context may be different from what you expected. If the detection result differs from your intent, recheck the Step 1 result table and select only the sub-projects you actually want to build.
Step 2: Build Settings
2.1 Single Project Settings
Basic Settings
- Project type: Detected language. Editable. (e.g., Node.js)
- Service name: Name used in docker-compose. (e.g.,
my-app) - Port number: Port exposed by the container. (e.g., 3000)
Language Version Settings
(See: Base image)
- Version: Language runtime version. (e.g., Node.js 18, 20, 22)
- Base image: Container base image tag suffix. (alpine, slim, bullseye)
- alpine: Minimum image size (fewer vulnerabilities in security scans)
- slim: Lightweight Debian-based (better compatibility)
- bullseye/bookworm: Full Debian (all packages available)
Advanced Options (Collapse section)
- Health Check (enabled by default): Adds container health checks. Required in production environments.
- Non-root User (enabled by default): Run as a non-root user. Recommended for security.
2.2 Monorepo Settings
Service Selection Table
- Select: Checkbox for services to build
- Path: Sub-project directory path
- Project type: Detected language
- Framework: Detected framework
- Version: Selectable language version.
- Base image: Selectable base image tag
- Port: Per-service port settings.
Advanced Options Per Service
Individually configurable for each service:
- Enable/disable Health Check
- Enable/disable Non-root User
2.3 Generate Template
Click the Generate Template button to create a Dockerfile and docker-compose.yml matching the settings.
Step 3: File Preview and Editing
3.1 Monaco Editor
Generated files are displayed in Monaco Editor (VS Code-based).
- Syntax highlighting: Dockerfile and YAML syntax highlighting.
- Autocomplete: Keyword autocomplete support
- Error checking: Real-time syntax error display
- Line numbers: Line number display
3.2 Generated Files
Single Project
Dockerfile(root): Container image builddocker-compose.yml(root): Local development orchestration.
Monorepo
Dockerfile(each service directory): Per-service image builddocker-compose.yml(root): Full service orchestration.
3.3 Dockerfile Examples
Next.js (SSR)
# Build stage
FROM node:20-alpine AS builder
WORKDIR /app
COPY package*.json ./
RUN npm ci --only=production=false
COPY . .
RUN npm run build
# Production stage
FROM node:20-alpine AS production
WORKDIR /app
# Non-root user setup
RUN addgroup -g 1001 -S nodejs && \
adduser -S nextjs -u 1001
COPY /app/.next/standalone ./
COPY /app/.next/static ./.next/static
COPY /app/public ./public
USER nextjs
EXPOSE 3000
# Health check
HEALTHCHECK \
CMD wget --no-verbose --tries=1 --spider http://localhost:3000/ || exit 1
CMD ["node", "server.js"]
React (SPA)
# Build stage
FROM node:20-alpine AS builder
WORKDIR /app
COPY package*.json ./
RUN npm ci
COPY . .
RUN npm run build
# Production stage
FROM nginx:alpine
COPY /app/build /usr/share/nginx/html
COPY nginx.conf /etc/nginx/conf.d/default.conf
EXPOSE 80
HEALTHCHECK \
CMD wget --no-verbose --tries=1 --spider http://localhost/ || exit 1
CMD ["nginx", "-g", "daemon off;"]
FastAPI (Python)
FROM python:3.11-slim
WORKDIR /app
# Non-root user
RUN addgroup --system app && adduser --system --group app
COPY requirements.txt .
RUN pip install --no-cache-dir -r requirements.txt
COPY . .
RUN chown -R app:app /app
USER app
EXPOSE 8000
HEALTHCHECK \
CMD python -c "import urllib.request; urllib.request.urlopen('http://localhost:8000/health')" || exit 1
CMD ["uvicorn", "main:app", "--host", "0.0.0.0", "--port", "8000"]
Spring Boot (Java)
# Build stage
FROM eclipse-temurin:17-jdk AS builder
WORKDIR /app
COPY . .
RUN ./gradlew bootJar --no-daemon
# Production stage
FROM eclipse-temurin:17-jre
WORKDIR /app
RUN addgroup --system spring && adduser --system --group spring
COPY /app/build/libs/*.jar app.jar
RUN chown -R spring:spring /app
USER spring
EXPOSE 8080
HEALTHCHECK \
CMD curl -f http://localhost:8080/actuator/health || exit 1
ENTRYPOINT ["java", "-jar", "app.jar"]
Go
# Build stage
FROM golang:1.21-alpine AS builder
WORKDIR /app
COPY go.mod go.sum ./
RUN go mod download
COPY . .
RUN CGO_ENABLED=0 GOOS=linux go build -a -installsuffix cgo -o main .
# Production stage
FROM alpine:latest
RUN apk --no-cache add ca-certificates
WORKDIR /app
RUN addgroup -S app && adduser -S app -G app
COPY /app/main .
RUN chown -R app:app /app
USER app
EXPOSE 8080
HEALTHCHECK \
CMD wget --no-verbose --tries=1 --spider http://localhost:8080/health || exit 1
CMD ["./main"]
3.4 docker-compose.yml Examples
Single Service
version: '3.8'
services:
  my-app:
    build:
      context: .
      dockerfile: Dockerfile
    ports:
      - "3000:3000"
    environment:
      - NODE_ENV=production
    restart: unless-stopped
Monorepo (Multiple Services)
version: '3.8'
services:
  frontend:
    build:
      context: ./frontend
      dockerfile: Dockerfile
    ports:
      - "3000:3000"
    depends_on:
      - backend
    restart: unless-stopped

  backend:
    build:
      context: ./backend
      dockerfile: Dockerfile
    ports:
      - "8000:8000"
    environment:
      - DATABASE_URL=postgresql://db:5432/app
    restart: unless-stopped

  admin:
    build:
      context: ./admin
      dockerfile: Dockerfile
    ports:
      - "3001:80"
    restart: unless-stopped
3.5 File Customization
You can directly edit the generated files as needed.
Common modifications:
- Add environment variables:
ENV NODE_ENV=production - Change port:
EXPOSE 8080 - Install additional packages:
RUN apk add --no-cache curl - Change build command:
RUN npm run build:prod - Volume mount: Add volumes to docker-compose.
3.6 Commit to Git Repository
When the preview and editing are done, click the commit button at the bottom of the Step 3 modal to automatically commit the generated files to the repository. The button label reads Commit to GitLab or Commit to GitHub depending on the repository type. (See: Branch)
If a Dockerfile created by another tool already exists in the repository, committing the preview content as-is will overwrite the original. If you want to keep the existing Dockerfile, close Build Wizard and start the build directly, or copy the original content into the preview before committing.
Commit information:
- Commit message:
chore: Add Dockerfile generated by KIOPS Build Wizard - Branch: Default branch configured in the service.
- Author: KIOPS System
Files committed:
- Single project:
Dockerfile,docker-compose.yml - Monorepo:
frontend/Dockerfile,backend/Dockerfile,docker-compose.yml
After completion:
- Verify the "Build environment files have been committed to the Git repository!" message.
- Build Wizard closes automatically.
- Now click the Build stage again to start the build.
Real-world Usage Scenarios
Scenario 1: Containerizing a New Next.js Project
Situation: You want to deploy a project created with create-next-app using KIOPS.
Steps:
- Register a service in [Service Management] (enter Git URL)
- Click Build → Build Wizard opens automatically.
- Click Detect project type
- Review detection results: Next.js, npm, SSR type
- Select version: Node.js 20, alpine
- Advanced options: Health Check checked, Non-root checked.
- Click Generate Template
- Review Dockerfile content (Next.js standalone mode optimized)
- Click Commit to Git Repo
- Ready to build!
Scenario 2: Monorepo Project Setup
Situation: Deploying a monorepo with a Frontend(React) + Backend(FastAPI) structure.
Steps:
- Enter monorepo Git URL when registering the service.
- Click Build → Build Wizard opens.
- Click Detect project type
- Monorepo detected: 2 sub-projects.
- Configure in the service selection table:
frontend/: React, Node.js 20, alpine, port 3000backend/: FastAPI, Python 3.11, slim, port 8000
- Click Generate Template
- Review Dockerfile for each service and root docker-compose.yml
- Click Commit to Git Repo
- Both services ready to build!
Scenario 3: Legacy Spring Boot App Migration
Situation: Migrating an existing Spring Boot project to containers.
Steps:
- Register service
- Click Build → Build Wizard opens.
- Detect project type: Spring Boot, Gradle.
- Verify settings:
- Java version: 17 (based on project's sourceCompatibility)
- Base OS: Eclipse Temurin JRE
- Advanced options: Health Check checked (using Spring Actuator)
- Click Generate Template
- Review and modify Dockerfile:
- Customize Gradle build command if needed.
- Verify Actuator health endpoint path
- Click Commit to Git Repo
Troubleshooting
Project Type Detection Failure
- Detected as "Unknown" type: No standard config files. Add
package.json,pom.xml,go.mod, etc. - Framework not detected: Dependency analysis failed. Manually select the framework.
- Analysis timeout: Large repository. Limit scope to a specific branch.
Git Repository Connection Error
- 401 Unauthorized: Token expired. Renew the GitLab/GitHub Access Token.
- 403 Forbidden: Insufficient permissions. Check
api,write_repositorypermissions for the token. - 404 Not Found: Repository/branch not found. Verify the Git URL and branch name.
Commit Failure
- "Protected branch": Branch is protected. Use a different branch or remove protection.
- "Merge conflict": File conflict occurred. Delete the existing files and retry.
- "File too large": Large file exists. Add exclusion settings to
.gitignore.
Build File Generation Error
- Invalid port: Auto-detection error. Manually specify the port number.
- Build command error: Non-standard script. Edit the Dockerfile directly.
- Dependency installation failure: Private registry issue. Add authentication settings to Dockerfile.
Monorepo-related Issues
- Sub-projects not detected: Non-standard structure. Add config files to each sub-directory.
- Inter-service dependencies: docker-compose configuration needed. Manually add depends_on.
- Shared code references: Build context issue. Consider a root-level Dockerfile.
Best Practices
Dockerfile Optimization
- Use multi-stage builds: Exclude build tools from production image
- Leverage layer caching: Copy frequently changing files last
- Use alpine base: Minimize image size
- Non-root user: Enhance container security.
- Add health check: Support K8s/Docker health management.
Security Considerations
- Do not hardcode secrets in Dockerfile.
- Exclude sensitive files with
.dockerignore - Run as non-root user.
- Update base images regularly.
- Exclude source code with multi-stage builds.
What's Next
Once Build Wizard has committed your Dockerfile, the recommended next steps are:
- Auto CI Setup: Register a Webhook so builds run automatically on Git push. You no longer need to trigger builds manually.
- Manual Build: Before enabling Auto CI, run a manual build once to confirm the build works end-to-end.
- Enable security scanning: To automatically scan for vulnerabilities (SAST/SCA) after every build, turn on Security Gate in the Auto CI modal.
Related Guides
- Auto CI Setup - Webhook-based automatic build
- Manual Build - Trigger builds directly.
- K8s Deployment - Kubernetes deployment.
- Docker Deployment - Docker environment deployment.