Kubernetes Cluster Registration
Register a Kubernetes cluster in KIOPS to manage nodes, namespaces, and workloads from the web UI. Registration follows one of two flows: Install New Runtime or Connect Existing Runtime (Import).
This guide is written so that operators who have never installed K8s by hand can bring a cluster into KIOPS just by following the modal screens. Once you decide whether to install fresh or import an existing cluster, KIOPS takes care of the rest over SSH.
Before You Start: Terms to Know
K8s terminology can feel intimidating at first. Here are the only terms you need for this guide.
- Cluster: A single K8s system as a whole. Many servers are bundled together and treated as one computer.
- Master / Worker node: Masters play the "brain" role (scheduling and control), while workers are the "hands" where containers actually run.
- kubeadm: The standard tool for installing and initializing K8s. KIOPS's new install flow also uses kubeadm.
- preflight: A pre-import step where KIOPS automatically inspects 8 items on each node (kubeadm, kubelet, container_runtime, cni_plugin, token_creation, cert_expiration, sudo_access, swap_status).
- management_level: The operational tier assigned from the preflight results:
full/limited/readonly. It determines what features are available. - VIP / HA: A virtual IP for multi-master setups. It keeps the cluster running even if one master goes down.
- Import: The flow that pulls an already-installed cluster into KIOPS (no kubeconfig upload; SSH auto-detection).
Why Register a Kubernetes Cluster?
- View cluster status at a glance on the dashboard
- Deploy and update services with just a few clicks
- Use auto-generated configurations without writing complex YAML files
- Centrally manage multiple clusters from one place
Kubernetes (K8s) is an open-source platform that automates the deployment, scaling, and management of containerized applications. It enables efficient container operations across multiple servers.
Prerequisites
- All nodes forming the cluster (or the master/worker nodes of the existing cluster you want to import) must be registered as devices first.
- The KIOPS server must be able to SSH into each node (using registered devices or a hop chain).
- For new installations, nodes must have swap disabled and run a kubeadm-compatible OS (Ubuntu 20.04+, RHEL 8+, etc.).
- For imports, nodes must already have kubeadm/kubelet/kubectl installed.
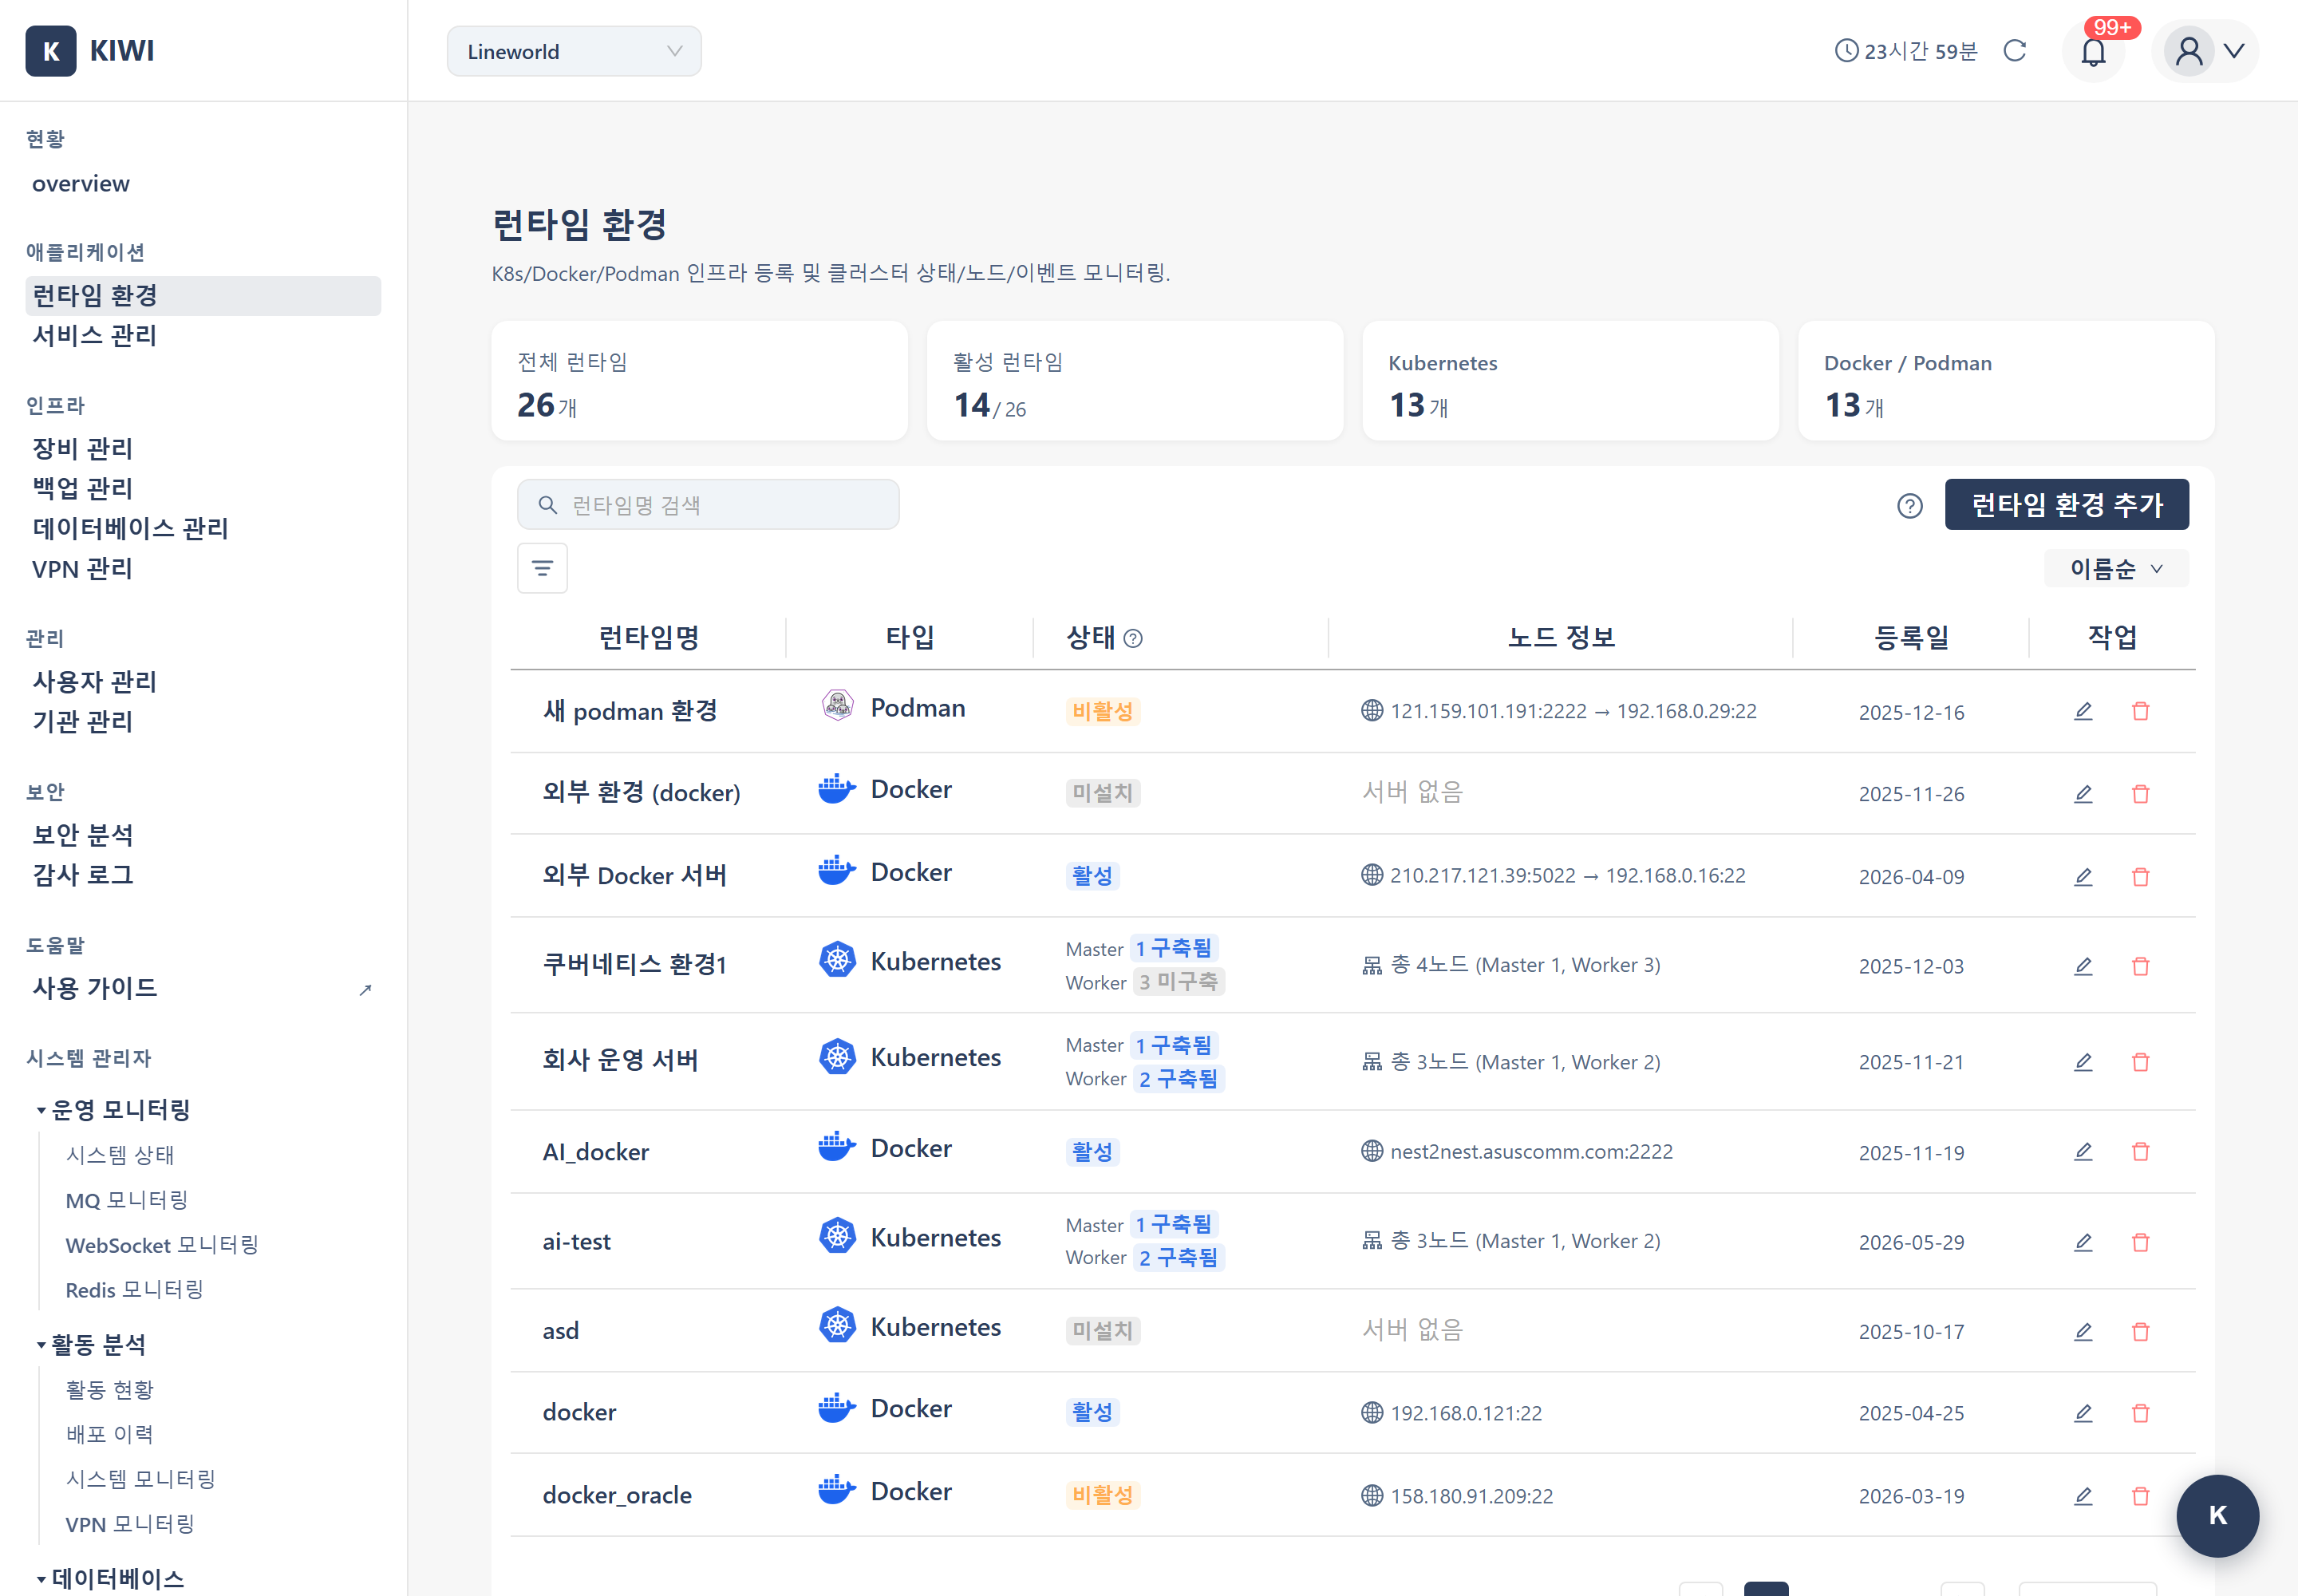
Entry Point: Add Runtime Environment
K8s clusters do not have a dedicated "Add K8s" button. Registration starts from the shared entry point.
- Click [Runtime Environment] in the left menu.
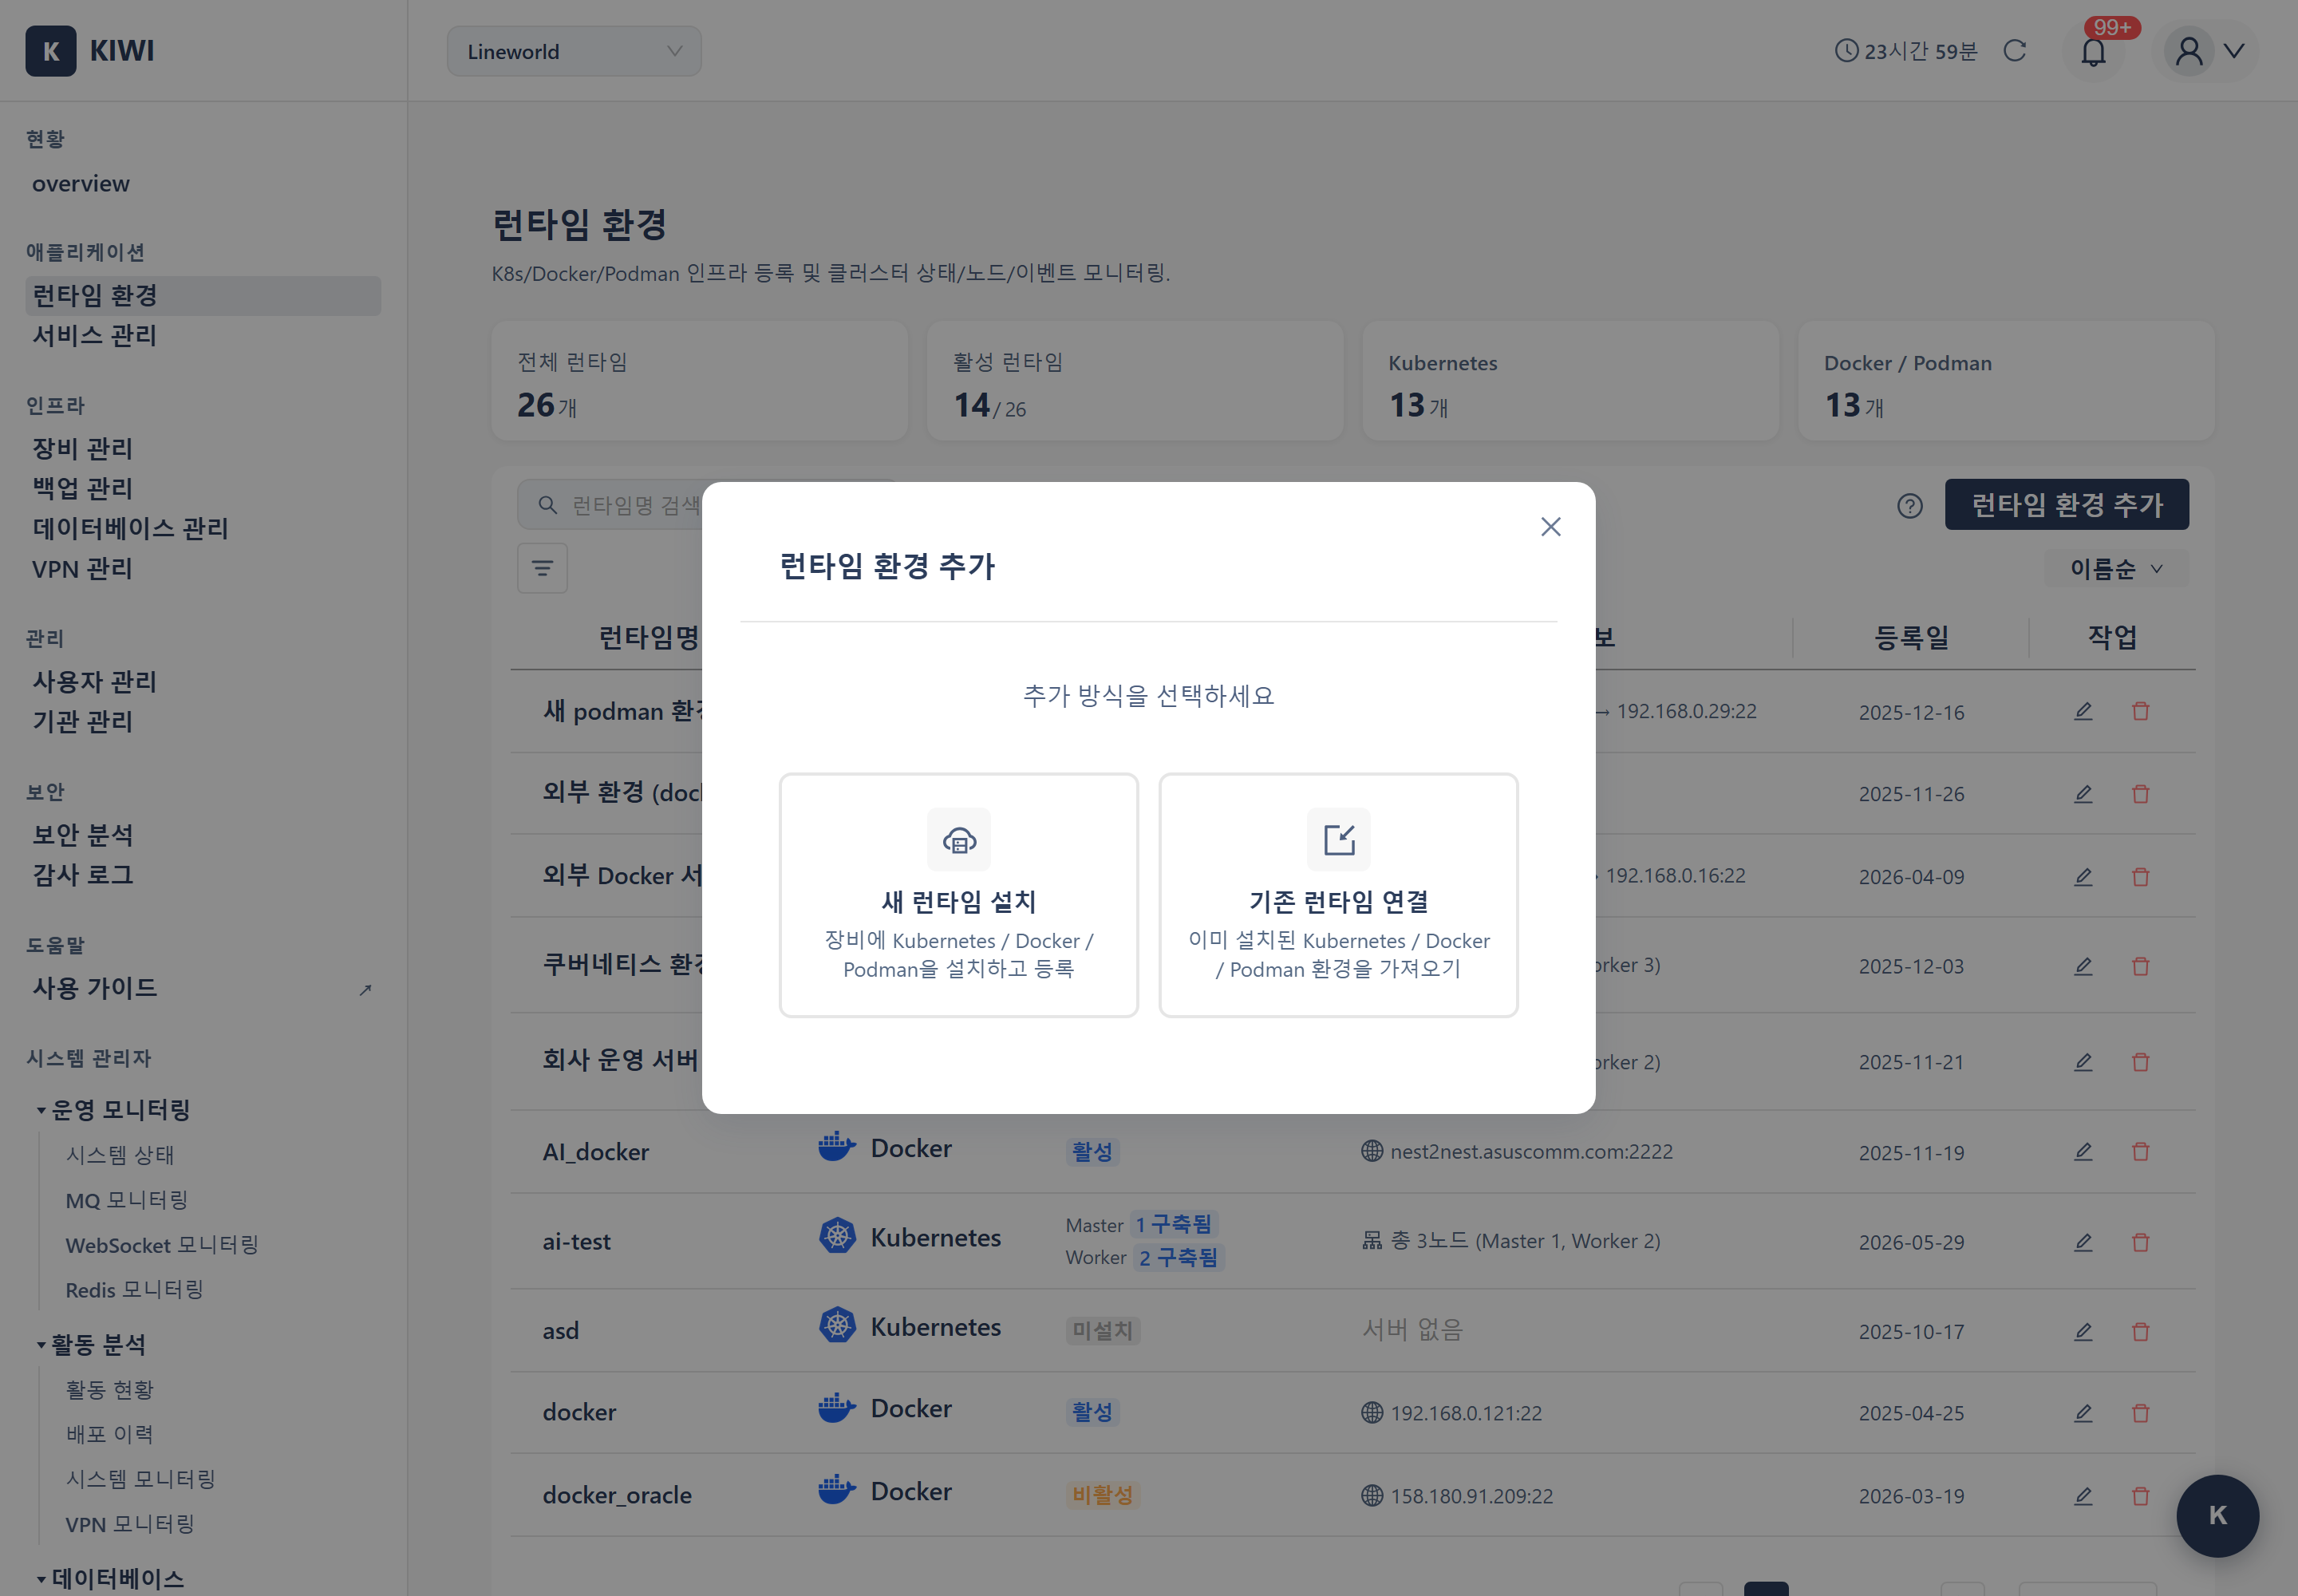
- Click the Add Runtime Environment button in the top right to open the Add Method Selection modal (internal component name: AddInfraSelectModal).
- Choose one of the two flows:
- Install New Runtime → New install flow
- Connect Existing Runtime → Import flow
Picking Install New Runtime against a cluster that has already been provisioned with kubeadm will try to re-initialize it and fail. For clusters that are already running, you must choose Connect Existing Runtime (Import) (see glossary).
New Install Flow
This is the Install New Runtime modal (internal component name: AddInfraModal). KIOPS connects to master/worker nodes via SSH and installs a kubeadm-based cluster directly. It supports single-master setups as well as VIP-backed HA configurations.
Step 1: Input
Enter the following fields.
- Environment Name: Identifier for the cluster (e.g.,
prod-cluster,dev-k8s). This name is used as the Kubernetes node name (kubeadm --node-name), so it must follow RFC 1123: only lowercase letters, digits, hyphens (-), and dots (.) are allowed, it must start and end with an alphanumeric character, and it must be 63 characters or fewer. Spaces, uppercase letters, and underscores (_) are not permitted; registration is rejected if the rule is violated. - Environment Info (Description): Free-form description
- Select Master Node(s): Pick one or more registered devices to act as masters.
- Select Worker Node(s): Pick devices to join as workers.
- VIP / HA Settings (Optional): Provide a control-plane VIP and interface for multi-master setups.
Step 2: Preview
Proceeding to the next step shows the cluster topology diagram alongside a table of selected nodes.
- Visually verify master/worker layout, VIP placement, and hop paths.
- Return to the previous step if anything needs to be changed.
Step 3: Register
- Clicking Register triggers KIOPS to SSH into each node and run kubeadm install + cluster init.
- Progress is shown in the modal in real time. Once finished, the cluster appears in the runtime list.
Import Flow
This is the Connect Existing Runtime modal (internal component name: ImportInfraModal). Register an existing cluster into KIOPS. kubeconfig file upload is not used; nodes are auto-detected via SSH and preflight checks are run.
Step 1: Select Environment Type
In the import modal, the Environment Type Select option labels visible to users are "Kubernetes / Docker / Podman" (Korean labels in the UI). The values external_kubernetes, external_docker, and external_podman are backend internal identifiers.
- Kubernetes: An existing K8s cluster (internal identifier
external_kubernetes) - Docker / Podman: Container runtimes (see their dedicated guides)
Step 2: Provide Connection Path
Choose one of the following:
- Select a registered device: Pick the device that will be used as the master node.
- Enter SSH hops directly: Specify the hop chain (including jump servers) manually.
Step 3: Auto-detect Nodes
- Click Import. KIOPS connects to the master node and uses the
calculateNodeslogic to auto-detect every node in the cluster (masters + workers). - There is no separate "Test Connection" button - SSH connectivity and preflight checks run at import time.
Step 4: Preflight Validation (8 Checks)
For each node, the following 8 items are verified.
kubeadmpresencekubeletinstallation and runtime status- container_runtime (containerd/docker/cri-o) status
- cni_plugin (calico/flannel/cilium, etc.) presence
- token_creation capability (
kubeadm token createpermission) - cert_expiration status
- sudo_access capability
- swap_status (disabled)
Step 5: management_level Evaluation
Based on preflight results, each node is assigned one of the following levels.
- full: All 8 checks pass - install/deploy/certificate renewal and all other features are available.
- limited: Some checks failed - read and partial operations only.
- readonly: Critical checks failed - status read-only.
You can still finish registration with a limited or readonly cluster, but deploy and certificate-renewal features will be blocked afterward, which is easy to overlook until something fails in production. When possible, resolve the failing items before registration so the cluster comes in as full.
Step 6: Duplicate Detection and Registration
- If a node's IP matches an already-registered device, KIOPS reuses the existing device rather than creating a new one.
- Only the nodes you select as registration targets are registered in batch.
- Once finished, the cluster appears in the runtime list.
KIOPS does not accept kubeconfig file uploads in either the new install or the import flow. All cluster commands are executed by SSHing into the master node and running kubectl directly.
Operators arriving from other K8s management tools often ask "where do I upload the kubeconfig file?". KIOPS has no kubeconfig upload field. Register the master node as a device and make sure SSH access is in place; that is enough.
Checking Cluster Status
Once registration is complete, the following information is available:
- Node list: Status (Ready/NotReady) and CPU/memory of nodes in the cluster.
- Namespaces: List of namespaces available in the cluster.
- Resource usage: Total CPU and memory usage in real time (with metrics-server installed).
- Workloads: Status of Deployments, Pods, Services, etc.
On the cluster detail page, verify that all node statuses are 'Ready'. Nodes in 'NotReady' status may have problems.
Troubleshooting
Preflight Failures During Import
If management_level is reported as limited or readonly, inspect the failing items on that node.
- kubeadm/kubelet missing: The cluster may not be kubeadm-based. Check
kubeadm versionandkubelet --versionon the node. - container_runtime failure: Run
systemctl status containerd(or docker/cri-o) to confirm the runtime is up. - cni_plugin missing: Check that
/etc/cni/net.d/contains a CNI config file. - swap_status failure: Run
swapoff -aand remove the swap entry from/etc/fstab. - sudo_access failure: Grant the SSH user passwordless or appropriate sudo permissions.
Connection Failure (Unable to connect to the server)
- Verify the master node's IP/port and SSH credentials.
- For hop chains, every intermediate device must also be reachable via SSH.
- Confirm that the firewall allows traffic between the KIOPS server and the master node.
What to Do Next
Cluster registration is complete. We recommend tackling the following items in order.
- Service Registration - Define the services you will deploy to this newly registered cluster.
- Metrics Server Installation - Install the Metrics Server, which underpins HPA and resource monitoring.
- K8s RBAC Management - If you need per-team isolation, split permissions using ServiceAccounts and namespaces.
Related Guides
- Service Registration - Register services to deploy to the cluster.
- K8s Deployment - Deploy services to Kubernetes.
- Metrics Server Installation - Enable resource usage collection.