Manual Build
Want to configure and run builds directly without using Auto CI? Manual build gives you complete control over the build process. It's useful for building specific branches or commits, or creating test images before deployment.
- When you want to test builds before setting up Auto CI
- When you need temporary builds for specific branches or commits.
- When you want to build urgent hotfixes immediately.
- When you want to verify after changing build settings.
Build Overview
KIOPS uses a single build engine, BuildKit, for container image builds. BuildKit runs inside Kubernetes Pods without requiring a Docker daemon, and build Pods run in the kiwi-builds namespace.
- Parallel DAG builds and cache mounts deliver fast build times.
- A variety of secret mounts allow credentials to be used safely during builds.
- Security: No Docker daemon needed, reducing privilege escalation risks.
- K8s Friendly: Builds run directly inside Kubernetes Pods, with no separate build server required.
- Caching Support: Layer/registry caches plus cache mounts reduce build time.
Supported Registries:
- Harbor (recommended)
- Docker Hub
- Private Docker Registry
Configuring a Build
Step 1: Navigate to Service Detail Page
- Go to the [Service Management] page
- Click on the service card you want to build to open the detail page
Step 2: Click the Build Stage
- Click the Build stage in the pipeline
- The build settings modal opens.
Step 3: Configure Dockerfile
There are three ways to specify the Dockerfile:
- Auto-detect: Automatically finds Dockerfile in the repository. Recommended for standard project structures.
- Specify path: Directly enter the Dockerfile path. Use when you have multiple Dockerfiles or non-standard locations.
- Build Wizard: Auto-generates a Dockerfile if one doesn't exist. Recommended for projects without a Dockerfile.
Dockerfile path examples:
./Dockerfile                    # Default Dockerfile at root (most common)
./docker/Dockerfile.prod        # Environment-specific Dockerfile
./services/api/Dockerfile       # Service-specific Dockerfile in monorepo
Placing the Dockerfile at the project root is the most common and recommended approach. Use auto-detect unless you have a specific reason not to.
Step 4: Confirm Build Target (Monorepo)
If the service uses a monorepo layout, the build modal scans the repository and automatically detects the list of buildable sub-projects. Pick the target service from the detected list. For a single-project repository this step is skipped.
BuildModal does not expose UI fields for build context, build arguments (ARG), or target stage. Define these directly inside your Dockerfile using ARG declarations and multi-stage syntax (FROM ... AS <stage>).
Step 5: Verify Image Registry Settings
You do not need to enter registry information separately. The registry_config configured during service registration is used automatically. To change the values, edit the Registry Settings on the service detail page.
Step 6: Auto-deploy Option (Optional)
Turn on the Auto-deploy toggle in the build modal to deploy immediately after a successful build. Enabling the toggle activates a dropdown for selecting the deploy target server; leaving it off runs the build only.
Step 7: Build Options (Optional)
You can specify additional options for a manual build:
- Build Profile: Selects the resource size allocated to the build Pod. Choose from
auto(default),small,medium,large,extra-large,2x-large, or4x-large. If a build fails with OOM or takes too long, move up to a larger profile. - No Cache: When enabled, BuildKit ignores its cache and builds every layer from scratch. Use this if you suspect a stale cache is being reused after dependency changes.
Step 8: Save Settings
- Click the Save button.
- Verify the "Build settings saved" message
Running a Build
Once configuration is complete, let's actually run a build.
Step 1: Select Build Branch
- Click the Build stage on the service detail page
- Select the branch to build from the branch dropdown
Building the wrong branch could deploy unintended code. Double-check the branch before building.
Step 2: Start Build
- Click the Start Build button.
- The build is queued and runs in order.
Step 3: Review Build Log
You can monitor build progress in real-time. BuildKit logs prefix each step with #<number> and use DONE/CACHED/ERROR markers to indicate the result.
BuildKit log example:
#1 [internal] load build definition from Dockerfile
#1 DONE 0.1s
#2 [internal] load .dockerignore
#2 DONE 0.0s
#3 [builder 1/4] FROM docker.io/library/node:20-alpine
#3 DONE 1.3s
#4 [builder 2/4] COPY package*.json ./
#4 CACHED
#5 [builder 3/4] RUN npm ci
#5 DONE 24.8s
#6 [builder 4/4] RUN npm run build
#6 DONE 12.1s
#7 exporting to image
#7 pushing layers 4.2s done
#7 DONE 5.1s
When a build fails, check the log to see which step caused the error. BuildKit prefixes each step with #<number>, and lines starting with ERROR indicate the cause of failure. A CACHED marker means the step was served instantly from cache.
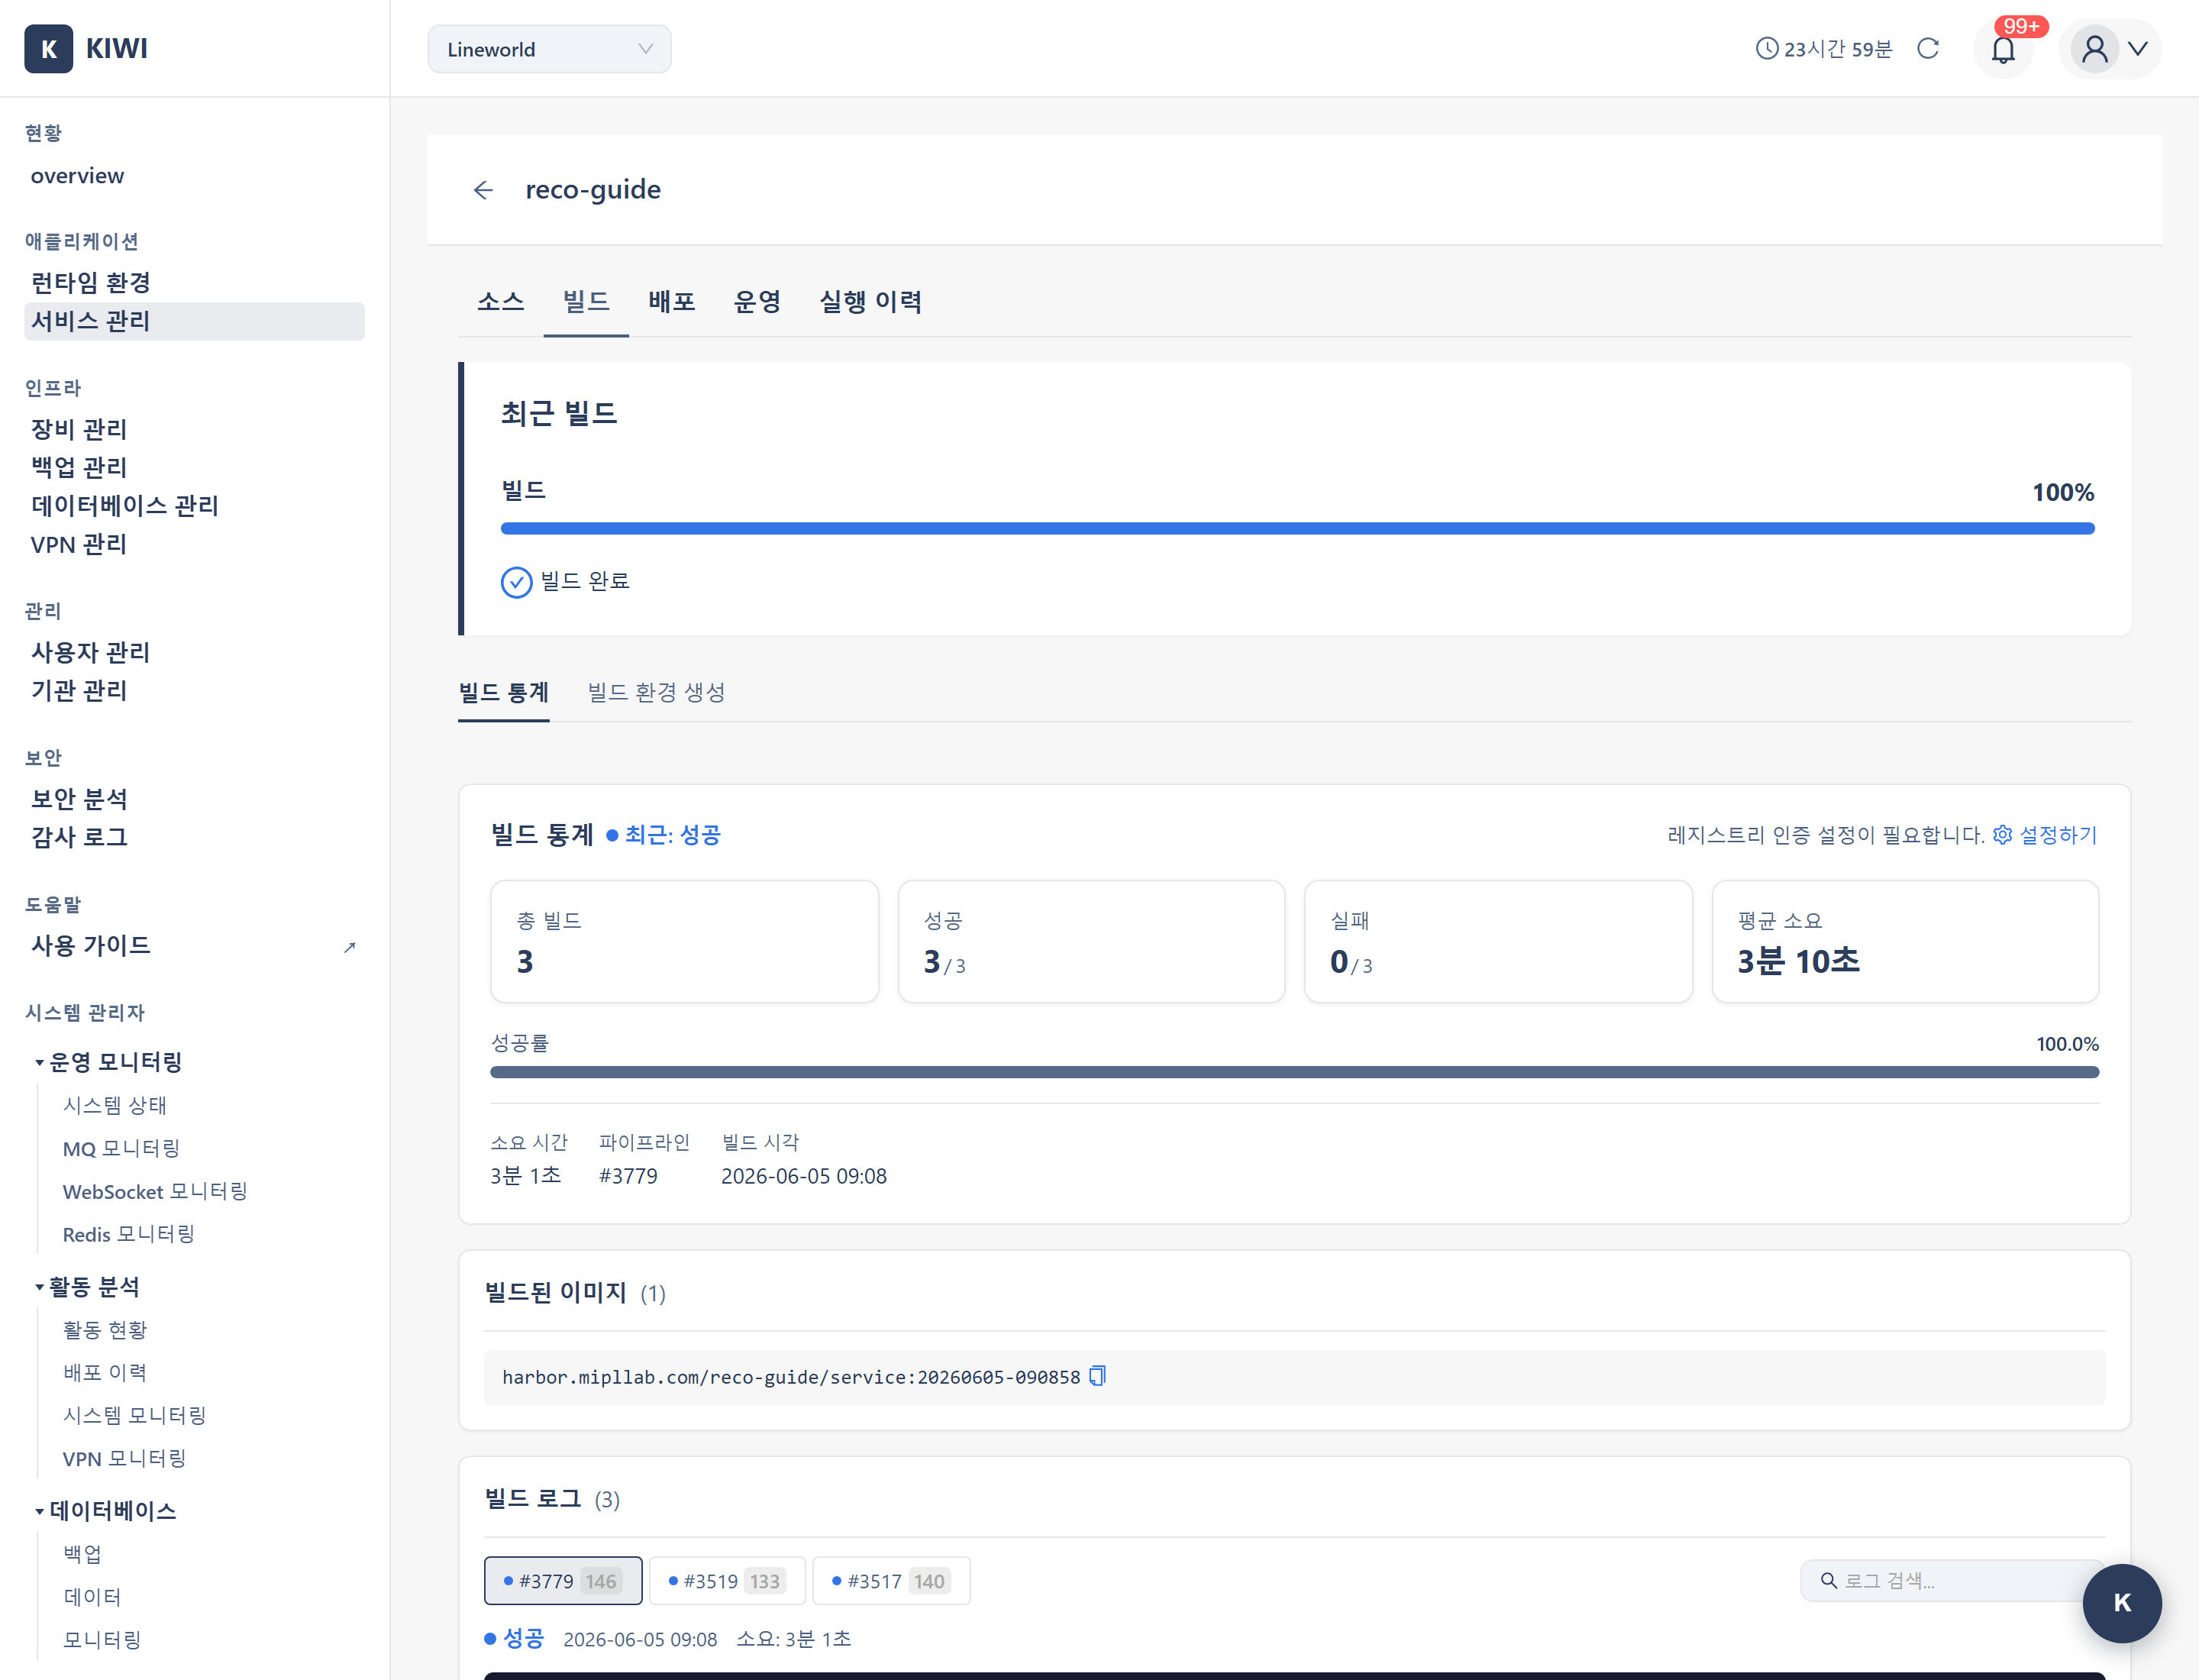
Step 4: Verify Build Completion
When the build completes, you can check the following information:
- Build Status: Success (green) or Failure (red).
- Image Tag: Full path of the generated image.
- Image Size: Size of the built image.
- Build Duration: Time from start to completion.
Build Optimization
Learn how to reduce build time and image size.
Improving Build Speed with Caching
KIOPS uses the following cache layers to optimize build speed:
- Layer Cache: Reuses unchanged Docker layers. Dramatically reduces dependency installation time.
- Registry Cache: Utilizes existing image layers. Reduces network transfer volume.
- Cache Mounts (BuildKit only): With
RUN --mount=type=cache,..., package manager cache directories such as npm/yarn/pip/maven can be reused across builds. This keeps dependency installation fast even after the first build.
The first build takes longer as all layers must be created fresh. From the second build onwards, cache is utilized for faster completion. If only source code changed, dependency installation steps are pulled from cache.
Dockerfile Optimization Tips
The order of Dockerfile instructions is important for effective cache utilization.
1. Place infrequently changing layers first
# Good example - dependencies first, source code later
COPY package*.json ./
RUN npm ci
COPY . .

# Bad example - changing source code reinstalls dependencies
COPY . .
RUN npm ci
2. Minimize image size with multi-stage builds
# Build stage: includes build tools (large image)
FROM node:20 AS builder
WORKDIR /app
COPY . .
RUN npm ci && npm run build
# Production stage: only what's needed to run (small image)
FROM node:20-alpine AS production
WORKDIR /app
COPY /app/dist ./dist
CMD ["node", "dist/main.js"]
3. Exclude unnecessary files with .dockerignore
node_modules
.git
.env
*.log
.DS_Store
node_modules or .git folders get included in the image, increasing build time and image size. Always create a .dockerignore file.
Build History
You can view and manage past build records.
How to View History
- Click the Build stage on the service detail page
- Select the Build History tab
Information Available in History
- Build Number: Sequentially assigned build identifier.
- Branch: Git branch used for the build.
- Commit: Commit hash at build time (click to go to GitLab).
- Status: Success / Failure / In Progress / Cancelled.
- Duration: Time taken for the build.
- Image Tag: Full tag of the generated image.
Check failed build logs to identify issues, or copy successful build image tags for deployment.
Troubleshooting
Common problems during builds and their solutions.
Dockerfile Not Found
- Path error: Verify the Dockerfile path is correct in build settings.
- Filename case: Check that
Dockerfilehas exact capitalization (dockerfilewon't be recognized) - Insufficient Git permissions: Verify the GitLab token has
read_repositorypermission.
Build Failure
npm ERR!: Dependency installation failed. Checkpackage.jsonandpackage-lock.json.COPY failed: File path error. Check paths and review.dockerignore.Permission denied: File permission issue. Fix file permissions or addRUN chmod.Out of memory: Insufficient memory. Request build Pod resource increase from administrator.
Image Push Failure
- Authentication failed: Re-verify Registry credentials (username/password) in service settings.
- Insufficient permissions: Check write permissions for the Registry project
- Size exceeded: Optimize image size with multi-stage builds.
If the above solutions don't work, review the complete build log and contact an administrator if needed.
Related Guides
- Build Wizard - Auto-generate Dockerfile when missing.
- Auto CI Setup - Automatic builds on code push
- K8s Deployment - Deploy built images to Kubernetes.